|
|
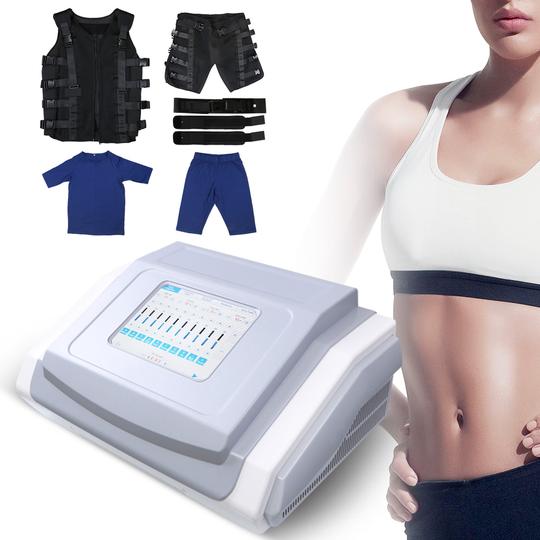
Description<span style="box-sizing: border-box; font-weight: 700; color: rgb(13, 12, 12); font-family: "Open Sans", sans-serif; font-size: 14px;">Model: MS-121X1
EMS Electronic Muscle Simulation Micro Current Suit Body Slimming Body Sculpting
General information 1) Explanation of terms
Programs are defined as settings that are based on various different parameters such as the pulse time, pulse width, pause time, etc .which generate a pulse within the desired intensity range that is specific to the selected workout. While the program is running, the desired pulse will be emitted for the previously selected duration. This makes it possible to engage in “freestyle ” training.
2) Pulse Intensity
* Currents in the range of thousandths of an ampere (MA) are used in EMS
* The pulse intensity determines the degree of recruiting the nerves and muscle fibers
* The stronger the pulse, the stronger the contraction takes place
* Every person reacts differently to the current intensity. Therefore, the current intensity must be regulated individually depending on the respective current sensitivity
* Pulse frequency
The pulse frequency is specified in Hertz (HZ ). The pulse frequency specifies how many individual pulses per second act on the musculature during the contraction phase.
a. Thereby, each pulse results in a muscle contraction
b. The number of muscle contractions is increased by increasing the pulse frequency.
--7Hz: Improved blood circulation and metabolic activation.
--85HZ: Optimum stimulation of striated musculature
--100Hz: Detonation and pain relief
* Pulse width 1. The pulse rise specifies in which time a current pulse increases to its maximum values. 2. The longer a single pulse lasts, the deeper it penetrates the tissue and increases the recruiting of the motor units
* Pause time The pause time is the time in s or ms in which no current flows
The recommendations for an optimum pulse -pause ratio fluctuate between 1:1 and 1:5. Instrument program setting The "program parameter" menu can be set up the parameter as follows:
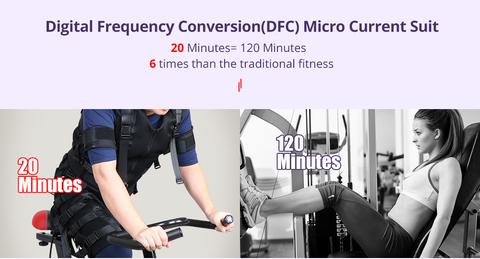
* Workout time: Set the total training time
* Pulse time: Defines the duration for which a pulse will be emitted
*Pause Time: Defines the time between the pulses
*Frequency: The pulse frequency in Hz indicates how many single pulses will be emitted per contraction phase.
*Pulse width: Defines the length of an individual pulse
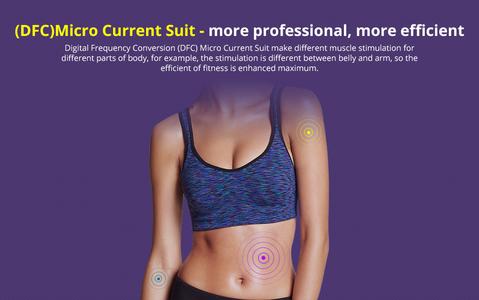
*Intensity adjustment: Each channel's intensity can be adjusted alone*
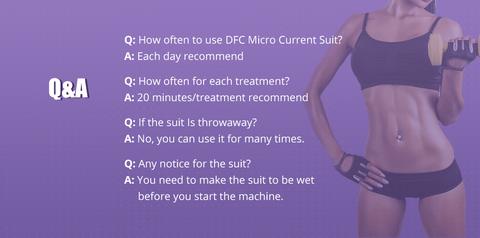
*Workout time: Set the time of training for specific customers. Before the tranining 1) Undergarments and shoes
Correct seating of the undergarments
Always pay attention to the correct size. The undergarments must fit closely everywhere, but must not cut into the skin or be too tight. Pay attention that trousers and shirt do not overlap under the electrode areas on the abdomen and back. Doubled fabric layers reduce the pulse transfer.
Slip-resistant shoes
Always wear sports shoes with slip-resistant sole for the training.
2) Moistening and attaching electrodes
Spread out the opened electrode vest and the individual electrodes on a level surface for the moistening. Moisten the electrode surfaces evenly using the pump spray bottle until a film of water forms on the surface...
If the electrodes are not moistened correctly, the pulses cannot be transmitted correctly.
If the electrodes are moved, always apply water again.
a, Layout electrodes ready in the correct size.
b, Check the cable layout.
c, Spray electrode vest with water until a visible film of water has formed on the electrodes.
d, Put on electrode vest.
Always ensure that the electrode vest fasteners are opened correctly.
e, Close the electrode vest using the zip fastener.
f, Tighten the electrode vest in accordance with the numbering on the electrode vest fasteners.
g, Connect the arm electrodes to the cabling.
h, Spray the leg electrodes
I, Tighten the leg electrodes with the Velcro fastener.
j, Connect the leg electrodes to the cabling.
k, Spray the electrodes for the buttocks.
l, Connect the buttock electrodes to the cabling.
The electrodes much are connected to the cabling before putting on the hip strap.
m, Put on the hip strap tightly.
n, Fix the hip strap with the Velcro fastener.
o, Close the hip strap with the Velcro fastener.
p, Spray the electrodes for the calf.
q, Connect the calf electrodes to the cabling.
r, Connect the control unit connection cable to the connector of the electrode vest. After traning 1, Hang the electrode vest on a clothes hanger for drying.
2, Sort the individual electrodes by size and layout for drying with exposure to good ventilation.
3, Check the electrodes regularly hygiene.
4, Danger of material damage: Incorrect cleaning can cause material damage.
Never use the following cleaning materials:
Synthetic cleaning agents
Solvents
Chloride
Polishing agents
Washing/polishing agents
Aerosol sprays
The electrodes are not resistant to chemical cleaning
Do not exceed a temperature of 30 degrees.
Do not use any fabric softeners and bleaches.
Do not dry in a dryer.
Do not iron or treat with steam.
Do not spin-dry.
Do not wring out.
Observe washing symbols.


|